There are several apps available for you to control your AirPods on Android devices. We’ll walk you through how to pair your AirPods with Android, as well as explain how to control and use certain apps like AirBattery. Here’s everything you need to know about making AirPods work with Android.
AirPods & Android: An Unhappy Mix
Once you buy one Apple product, it’s very easy to be drawn into the Apple ecosystem with others. Apple products rarely play well with non-Apple devices, and as the main competitor in the mobile market, Android devices are no different. AirPods work perfectly with an iPhone or Mac, but you’ll need a little extra for Android. That’s not to say that some functionality won’t work out-of-the-box, but many of the must-have AirPod features like ear detection to pause your music automatically won’t work without a third-party app installed. Thankfully, Android app developers have stepped up, and there are several AirPod control apps available. We’ve already mentioned one—AirBattery, which has over a million downloads in the Google Play Store. Others are available, however, including AirDroid and PodAir. Each of these apps attempts to offer the same functionality for AirPods that you’ll see on iOS and macOS devices, but your own experiences may vary. If one app doesn’t work, try another. Your success in using them may depend on the app or your device, but they aren’t guaranteed to work. Unfortunately, even with these apps installed, you won’t have the same, seamless experience that you’d find using an iPhone, but it will be close.
Pairing AirPods With Android
Just as you might connect a PS4 controller to an Android device, AirPods should be able to connect to any Bluetooth-capable device. Almost all Android devices available come with Bluetooth connectivity, so assuming your Android device isn’t too old, pairing your AirPods with Android shouldn’t be a problem. These steps may vary, of course, depending on your version of Android, and the type of device you have. These instructions should work fine with a modern version of Android (Android 10) and the process should be similar for other versions, too.
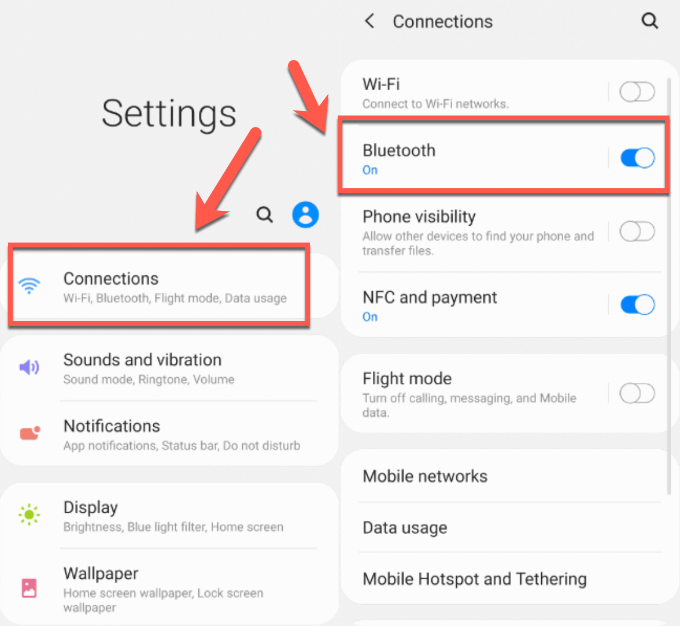
You’ll need to enable Bluetooth on your Android device before you can pair it. You can do this by swiping down to access your notification drawer and pressing the Bluetooth tile, or by pressing the Bluetooth slider in your Android settings menu. This may be listed in another sub-menu like Connections on Samsung devices.
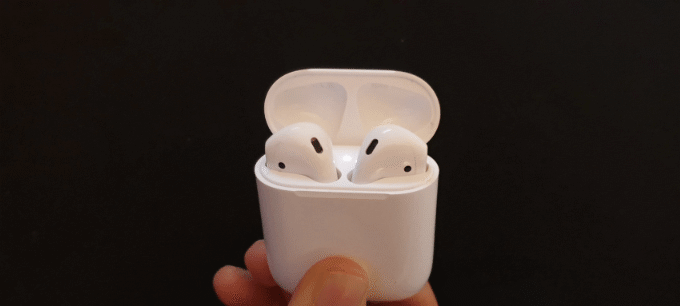
With Bluetooth enabled, you can begin scanning for your AirPods. With your AirPods in the charging case and the case lid open, press and hold the setup button at the back of the case. Once your AirPods are in pairing mode, the LED light at the top of the case will begin to flash white.
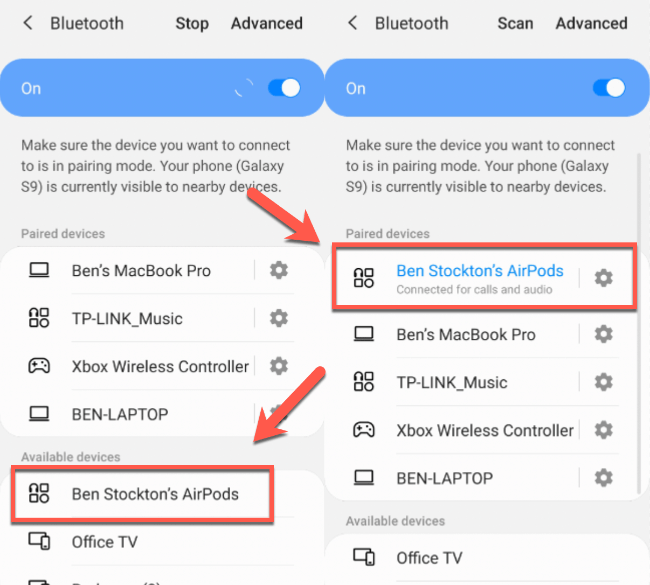
While the LED flashes, enter the Bluetooth settings menu and check your list of Available Devices. If you don’t see the AirPods listed, press Scan. Press on the device listing for your AirPods in the list to begin the pairing process, pressing OK to confirm. Once the pairing process completes, your AirPods should move to the Paired Devices section.
Once paired, the AirPods should work for basic calls and audio playback. Many of the additional features aren’t supported by Android, which is why you’ll need to install an AirPod control app.
Installing An AirPod Control App
An app to control your AirPods will allow you to skip tracks by tapping your AirPods, automatically pause your AirPods when you remove one of them from your ear, as well as check the battery levels for your AirPods and charging case. We recommend AirBattery or AirDroid (not to be confused with the popular file transfer app), but many similar apps are available in the Google Play Store. These instructions will explore how to install and use AirBattery on Android, but the steps should be similar for other apps.
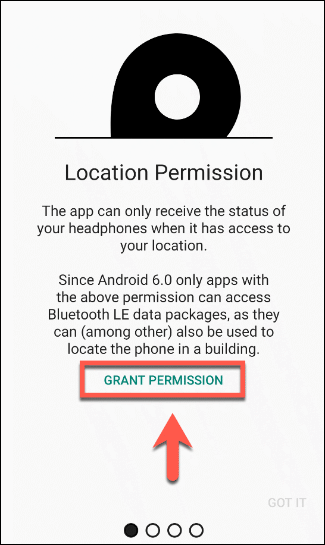
Start by installing AirBattery from the Google Play Store. When you first open the app, you’ll need to grant the app certain permissions to control your device. Press Grant Permission and follow the on-screen instructions for your version of Android to allow the app access to each setting.
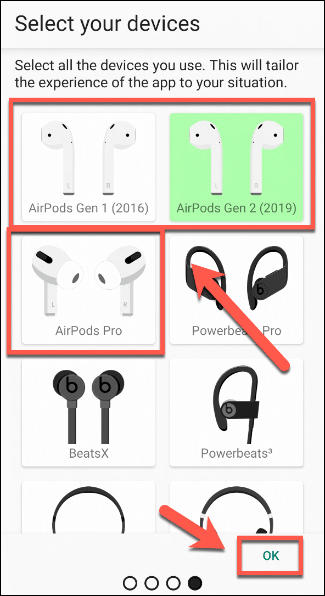
Select your AirPods device from the list. AirBattery, for instance, supports various AirPods clones alongside the official Apple versions. Once your device is selected, press OK to proceed.
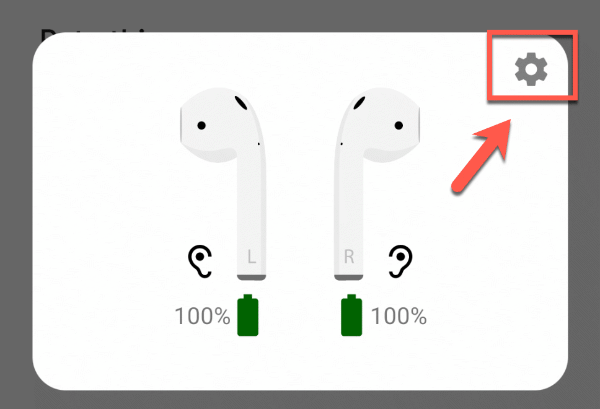
Once you select your device from the list, AirBattery will be configured. You can view your AirPods status by swiping down the notifications drawer. Pressing on the AirBattery notification or opening the AirBattery app directly will show the current battery levels, as well as allow you to access other AirBattery settings. Press the spanner icon to access AirBattery settings.
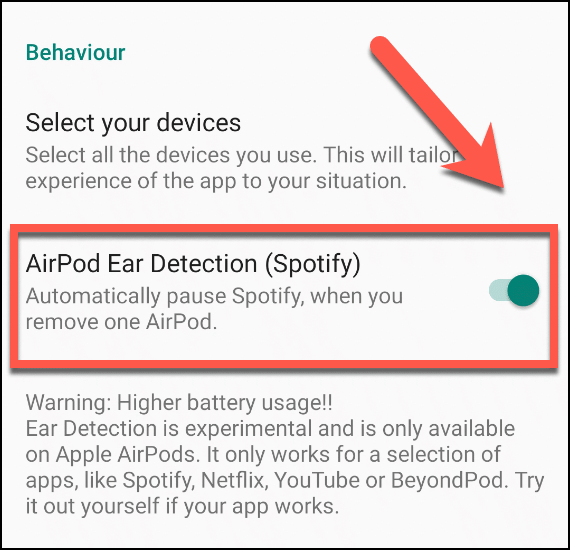
You’ll need to enable AirPod Ear Detection for your AirPods to automatically pause any playing video or music when you remove one or both from your ears. Press the slider next to that option under the Behavior section in the AirBattery settings menu.
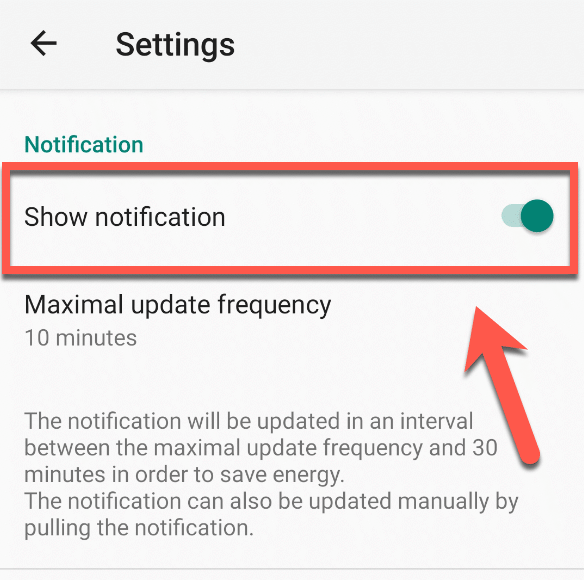
Enabling AirPod Ear Detection in AirBattery disables the up-to-date notifications bar. If you’d prefer to keep this enabled, disable AirPod Ear Detection by pressing the slider next to it, then press Show notification under the Notification section.
Once AirBattery (or another AirPod control app) is installed and configured, you should have near-to-full functionality enabled on your Android device. You won’t be able to configure your AirPods to activate Siri, for instance, but you should be able to use other AirPods features like ear detection and track skipping.
Using AirPods Productively
Asking “do AirPods work with Android?” isn’t the right question to ask. As we’ve shown here, AirPods can and do work well with Android devices, but you’ll need a third-party app to gain full functionality. It’s a little easier to use AirPods on Windows, but you’ll find the best experience is to be found on iOS and macOS. You can also change the function of your AirPods to use them in other ways, especially on an iPhone or Mac. What devices do you use your AirPods with? Let us know in the comments below.

