In this article, I’m going to talk about how you can use formulas inside tables in Word. There are only a handful of formulas you can use, but it’s enough to get totals, counts, round numbers, etc. Also, if you are already familiar with Excel, then using the formulas in Word will be a piece of cake.
Insert Formulas into Word Tables
Let’s start out by creating a simple test table. Click on the Insert tab and then click on Table. Choose how many rows and columns you want from the grid.
Once your table has been inserted, go ahead and add in some data. I’ve just made a really simple table with a couple of numbers for my example.
Now let’s go ahead and insert a formula. In the first example, I’m going to add the first three values in the first row together (10 + 10 + 10). To do this, click inside the last cell in the fourth column, click on Layout in the ribbon and then click on Formula at the far right.
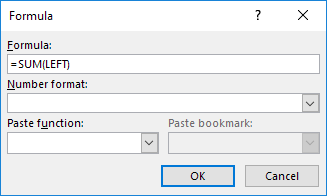
This will bring up the Formula dialog with a default of =SUM(LEFT).
If you were to simply click OK, you will see the value we are looking for in the cell (30).
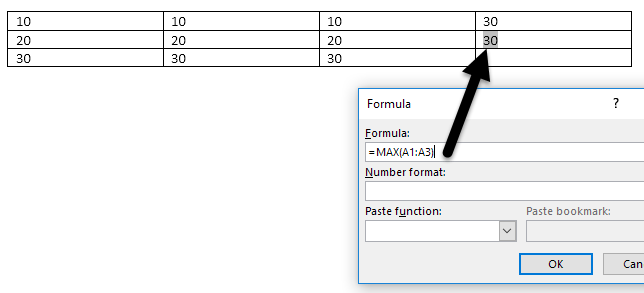
Let’s talk about the formula. Just like Excel, a formula starts with an equals sign, followed by a function name and arguments in parenthesis. In Excel, you only specify cell references or named ranges like A1, A1:A3, etc., but in Word, you have these positional terms you can use. In the example, LEFT means all cells that are to the left of the cell in which the formula is entered. You can also use RIGHT, ABOVE and BELOW. You can use these positional arguments with SUM, PRODUCT, MIN, MAX, COUNT and AVERAGE. In addition, you can use these arguments in combination. For example, I could type in =SUM(LEFT, RIGHT) and it would add all the cells that are to the left and right of that cell. =SUM(ABOVE, RIGHT) would add all numbers that are above the cell and to the right. You get the picture. Now let’s talk about some of the other functions and how we can specify cells in a different manner. If I wanted to find the maximum number in the first column, I could add another row and then use the =MAX(ABOVE) function to get 30. However, there is another way you can do this. I could also simply go into any cell and type in =MAX(A1:A3), which references the first three rows in the first column.
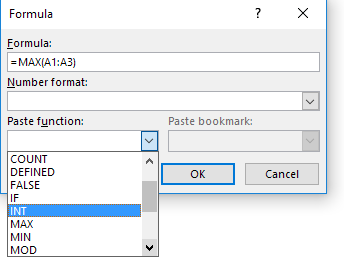
This is really convenient because you can put the formulas anywhere you want in the table. You can also reference individual cells like writing =SUM(A1, A2, A3), which will give you the same result. If you write =SUM(A1:B3), it will add A1, A2, A3, B1, B2, and B3. Using these combinations, you can pretty much reference any data you like. If you want to see a list of all the functions you can use in your Word formula, just click on the Paste Function box.
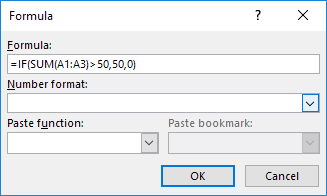
You can use IF statements, AND and OR operators and more. Let’s see an example of a more complex formula.
In the example above, I have =IF(SUM(A1:A3) > 50, 50, 0), which means that if the sum from A1 to A3 is greater than 50, show 50, otherwise show 0. It’s worth noting that all of these functions really only work with numbers. You can’t do anything with text or strings and you can’t output any text or string either. Everything has to be a number.
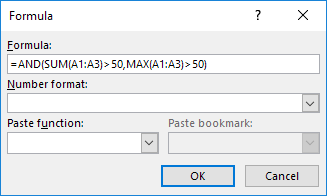
Here’s another example using the AND function. In this example, I am saying that if both the sum and max value of A1 to A3 is greater than 50, then true otherwise false. True is represented by a 1 and False by 0. If you type in a formula and it’s got an error in it, you’ll see a syntax error message.
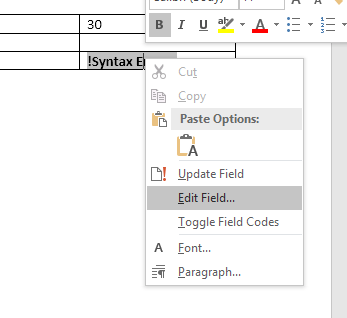
To fix the formula, just right click on the error and choose Edit Field.
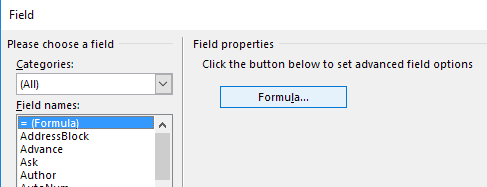
This will bring up the Field dialog. Here you just have to click on the Formula button.
This will bring up the same Formula editing dialog that we’ve been working with since the beginning. That’s about all there is to inserting formulas into Word. You can also check out the online documentation from Microsoft that explains each function in detail. Overall, it’s nothing even close to the power of Excel, but it’s enough for some basic spreadsheet calculations right inside Word. If you have any questions, feel free to comment. Enjoy!


