Depending on how you want the inserted slides to appear in the main presentation, you will need to choose between two different methods for joining the presentations. In this article, I’ll mention both methods along with the advantages and disadvantages for each method. The first method uses the Reuse Slides option in PowerPoint and the second method uses the Insert Object option.
Reuse Slides Method
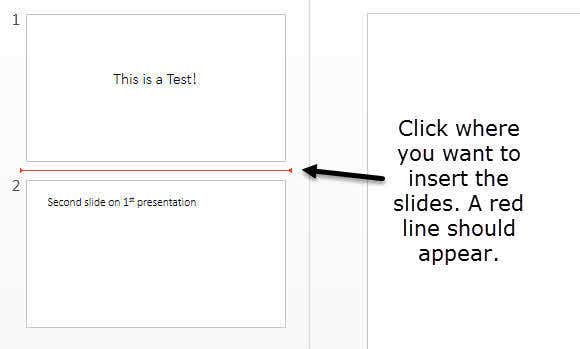
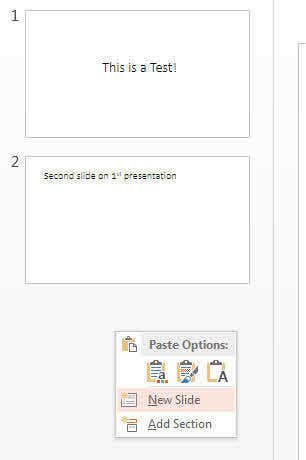
If you want the inserted slides to match the theme of your main presentation, then you have to use the Reuse Slides option. The inserted slides will simply take the slides exactly as they are in the external presentation and add them to the main presentation. However, there is one big caveat: none of the animations or transitions will be carried over. Whatever you see on the slide in the normal viewing mode is what will get imported into the main presentation. If you need to maintain all the animations or transitions, then skip down to the Insert Object method. To get started with this method, open the main presentation and then click between the two slides you want to import the slides into. It’s worth nothing that this method also lets you pick and choose which slides you want to insert from an external presentation, whereas the Insert Object method will insert the entire presentation.
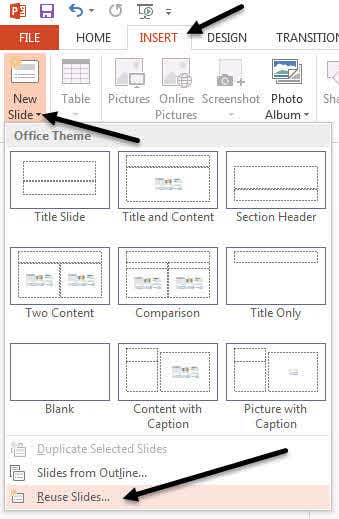
Now click on the Insert menu and then click on the words New Slide and you’ll see a menu appear. At the very bottom of that menu is an option called Reuse Slides.
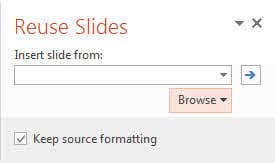
When you click on that, a tab will appear on the right hand side. Click on the Browse button and then select Browse File. Check the Keep source formatting box if you want keep the theme and text formatting of the external presentation. If you uncheck that box, then when you go to insert the slides into the main presentation, the original formatting will not be kept. Instead the slides will use the theme and formatting of the main presentation.
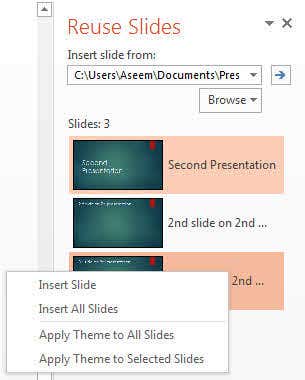
Select the PowerPoint Presentation you want to insert and then click OK. Immediately, you should see a small thumbnail and the title of each slide displayed.
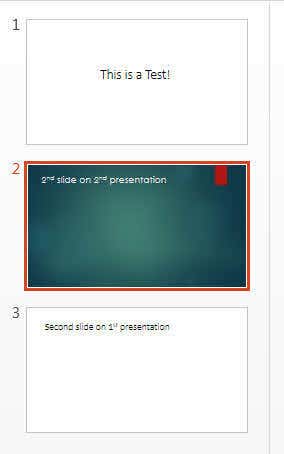
As you can see above, the second presentation has a different theme than my first presentation. There are a number of things you can do at this point. Firstly, if you just want to insert one slide or a couple of slides from your external presentation, simply click on the slide and it will be inserted! The formatting will depend on whether you checked the Keep source formatting box like I explained above. As shown below, I inserted just one slide from the external presentation and kept the source formatting.
It will be inserted wherever you had clicked earlier with the red line. If you want to insert all the slides, just select the Insert All Slides option that comes up when you right-click on any of the slides. Lastly, you can apply the theme used in the external presentation to your main presentation by right-clicking and choosing Apply Theme to All Slides. This will apply the external presentation theme to the main presentation. As mentioned earlier, you lose all animations, effects, transitions, etc when using this method. Now let’s talk about the other way to merge two presentations.
Insert Object Method
The second method will insert the entire external presentation into one slide as an object. You then have to configure some settings so that when you run your slideshow, it also runs through all the slides in the external presentation. There are a couple of things that need to be mentioned before we get into how to use this method:
- When you insert the presentation as an object, it is not a link to the presentation, but an actual full copy into the main presentation. This means that if you open the external presentation later after inserting it into the main presentation and make changes to it, those changes will not be reflected in the imported version inside the main presentation.
- If you do want to make changes to an already inserted presentation, you can edit it inside the main presentation. Again, those changes are only made to the version inside the main presentation. In my opinion, this method is better than the Reuse Slides method because it lets you keep all your animations and transitions and it allows you to change or keep the theme of the inserted presentation. To get started, open the main presentation and then insert a new slide. Make sure to delete any default text boxes or anything else on the new slide so that it is completely blank.
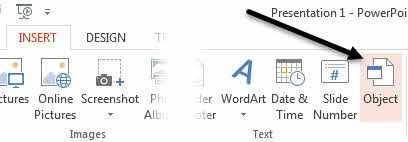
Now click on the Insert tab and then click on Object.
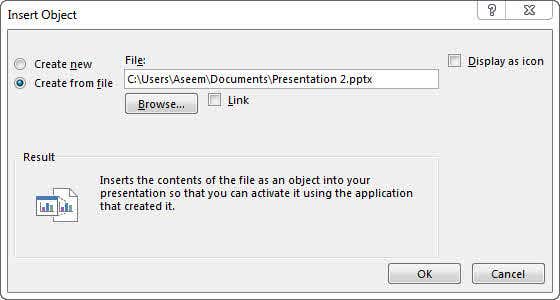
Select the Create from file radio button and click the Browse button. Select the external presentation you want to insert into your main presentation.
You’ll now see the first slide of the presentation inserted as a selectable object. All of the other slides are there, but you just can’t see them.
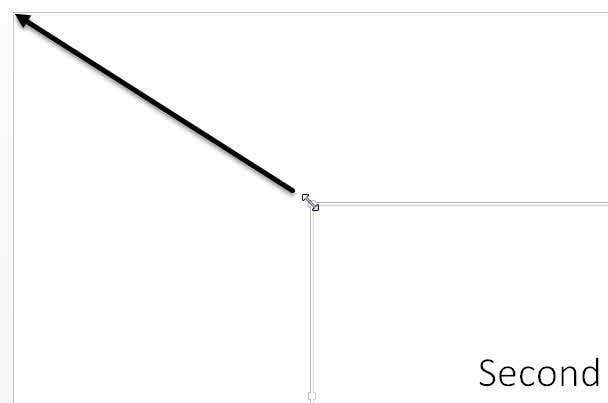
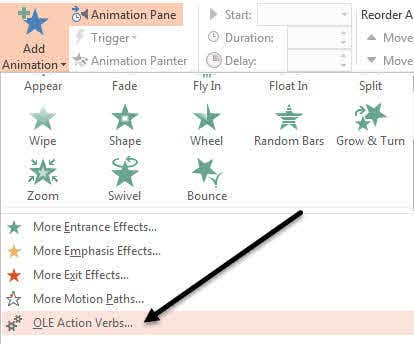
The next step is to move your cursor to the upper left corner of the inserted object until it turns into a double sided arrow. Click and then drag the corner to the upper left corner of the main slide. Now do the same thing with the bottom right corner of the object and drag it to the bottom right corner on the main slide. Now the inserted object should be the exact same size as the slide that it was inserted onto. You want to do this so that there won’t be any change in the size of the slides when you are playing the presentation. Once that is setup, we have to configure the second presentation to play when we hit that slide that we inserted the presentation into. To do this, select the object, click on the Animations ribbon, click on Add Animation and then scroll all the way to the bottom where it says OLE Action Verbs.
Another dialog will pop up and you want to choose Show. If you were to play the presentation at this point, you would notice that when you reach the slide with the inserted presentation, it will show all the slides in the inserted presentation, but it will also include a still slide of the first slide at the front and back of the inserted presentation.
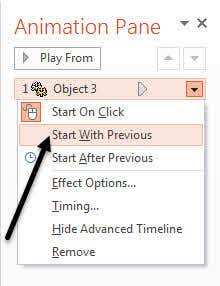
This was kind of annoying to me and luckily you can almost get rid of it. First, click on Animations again and then click on Animation Pane, which will show up at the right.
In the Animation Pane, you will see the inserted object listed as Object 1 or Object 2, etc. and when you select it, there will be a small black arrow you can click on. This will bring up a few options and then first one you want to select is Start With Previous.
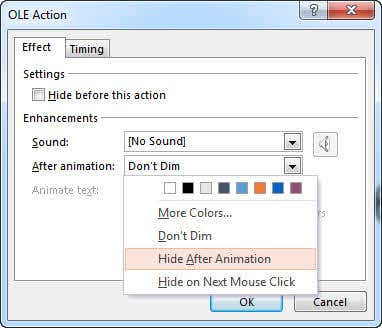
Now when you play the presentation, it won’t show you that still image of the first slide but will actually play the first slide from the external presentation. To get rid of the still image at the end of the presentation, you have to select Effect Options from the menu above and then select Hide After Animation from the After animation dropdown box.
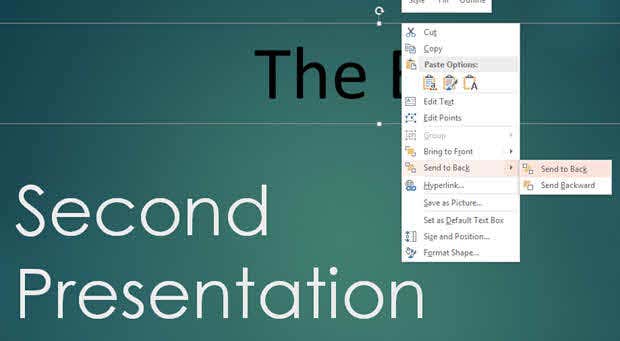
It’s not perfect because it still shows you the empty slide that the inserted presentation was put once before the presentation ends. Luckily, I found a simple hack for this too that works really well. Simply add something to the slide that has the external presentation object like a text box or whatever you like and then right-click on the object and choose Send to Back.
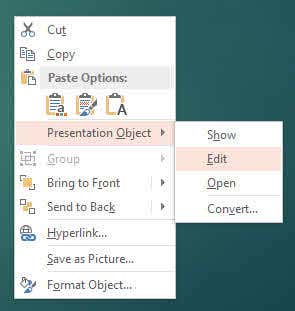
This will effectively hide the object behind the presentation object. Now when you play your presentation, it will hide the presentation object after the last slide because that is what we chose in the After animation option. When the presentation object is hidden, you’ll see any content that was hidden under it. It’s a great way to avoid having that blank slide show up during the presentation. One last thing I wanted to mention was about editing the inserted presentation. You can right-click anywhere on the object and choose Presentation Object – Edit to edit any slide in the inserted presentation directly within the main presentation.
Hopefully, this was a detailed enough tutorial for anyone wanting to merge, combine or insert one PowerPoint presentation into another. If you have any questions, feel free to comment. Enjoy!
