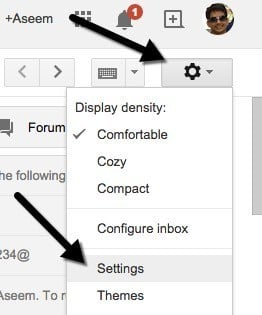
If you’re ok with Outlook, then you have no problem. However, if you prefer to use Gmail for everything, since its web-based and has better spam filtering and security, then you might be interested in setting up all of your email accounts in Gmail and managing them from there. In this article, I’ll explain the steps for using Gmail as a master account for collecting email from all of your other online accounts. First, log into your Gmail account and click the little gear icon at the top right. In the menu, go ahead and click on Settings.
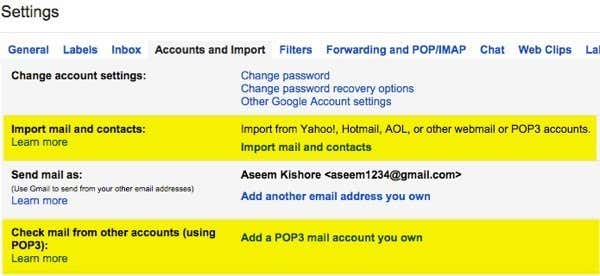
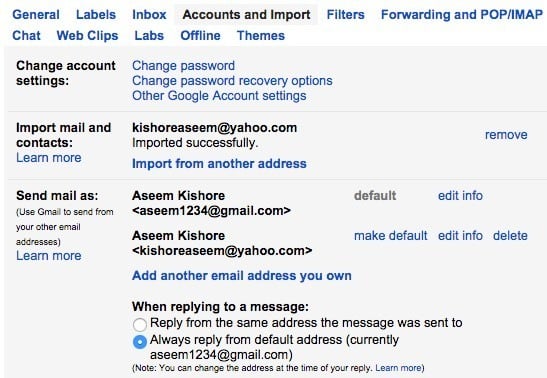
Now click on the Accounts and Import tab and you’ll basically see two different options for importing emails into Gmail. One option it to Import mail and contacts and the other is to Check mail from other accounts (using POP3).
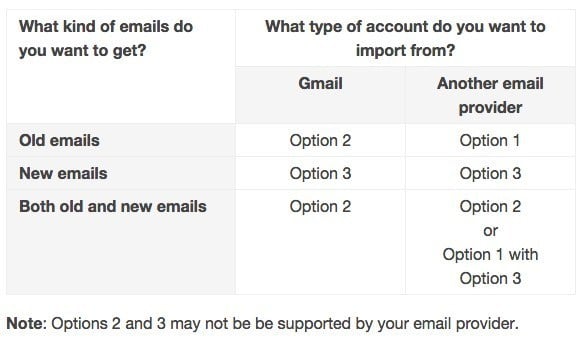
It’s a bit confusing, but luckily Google has a short page written about the different ways to move email into your Gmail account. Basically, you have to decide whether you want to import only old emails, only new emails, or both old and new emails.
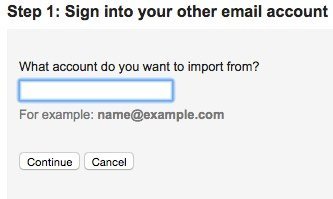
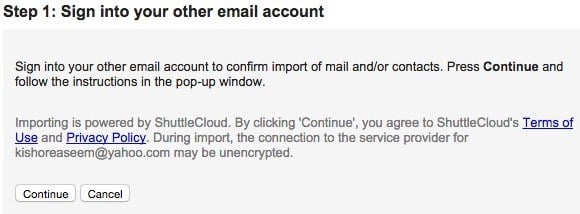
Option 1 is for getting old emails from a different email provider into Gmail and for that you’ll click on the Import mail and contacts link under Accounts and Import. You can import email from Hotmail, Yahoo, AOL or any other email provider that allows POP3 access. When you click on the link, a new tab will open and you’ll be asked for the email address for the other account.
Click Continue and you’ll get a message stating that you have to log into your other email account to confirm the import. It also says that a third-party company called ShuttleCloud carries out the process and that the transfer may be unencrypted.
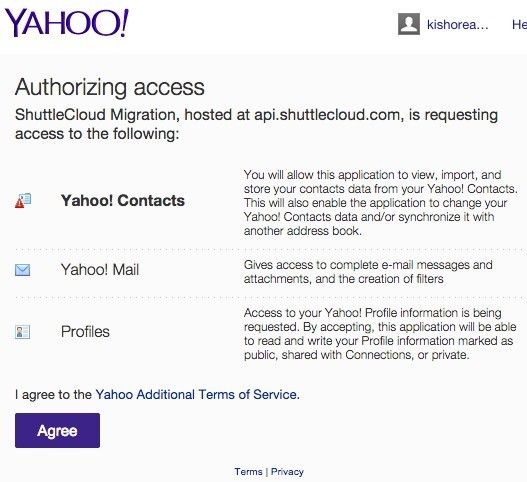
Once you are signed into your other email account go ahead and click Continue. Depending on your email provider, a new window will pop up asking you to confirm that ShuttleCloud can access all your data.
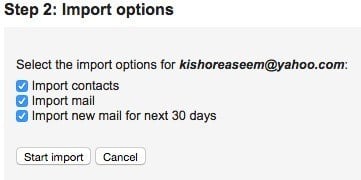
Once authorization has been successful, it’ll ask you to close that window. Go ahead and do that and on the previous window that you were on before, it’ll update and move on to Step 2, which is to choose what you want to import.
The last option Import new mail for next 30 days is why this option is really only useful for importing older email from a non-Gmail client into your Gmail account. If you just want new emails to come into the account, you should choose the second option way above, which was Add a POP3 mail account you own. I’ll explain that option next. For now, click Continue and the process of importing will begin. If you are trying to migrate all your old email from another email provider and you also want all the new email to come to your Gmail account, then the best thing to do is to uncheck Import new mail for next 30 days and then setup the add POP3 account separately. That way your old mail will be imported and new mails will be checked too.
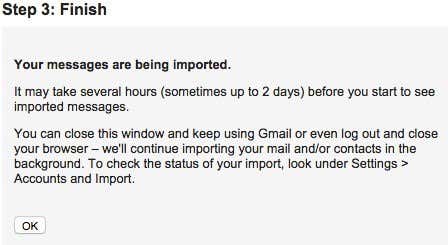
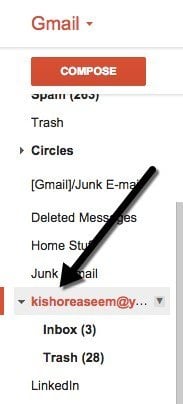
If you have a ton of old email, it could take up to several days for the emails to import into your Gmail account. So where does all those imported email go? Well, glad you asked! Basically, when you expand the list of folders and labels on the left side of Gmail, you will see it listed in alphabetical order along with everything else.
The really nice thing about importing using Gmail is that it converts all the folders from your other accounts into labels into of just taking all the emails and dumping them into one giant Inbox. Now when you go back to Accounts and Import, you’ll see a few new options.
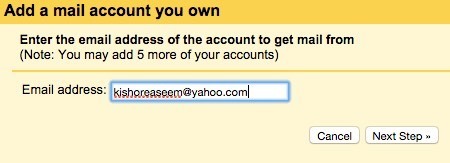
Firstly, you’ll be able to see the progress of the import here. Since I had a whopping three emails in my Yahoo account, it finished the import almost immediately. Under Send mail as, you’ll see that you can make your other email address the default for sending mail, but I’m not sure why you would want to do that. Lastly, when replying to a message, it will automatically reply from your Gmail address because it assumes you want people to start using that email to contact you. However, if you don’t want that, you can choose Reply from the same address the message was sent to and when you reply to an email from the other email account, it will also reply from that email address instead of your Gmail address. It should also be noted that you can click the delete button under Send mail as for the other email account, but that will not delete the actual emails that had been previously imported. If you want to delete all the imported mails, you have to go to the label and click on the arrow next to it and choose Remove label. It will then show you the label and any sub-labels and confirm whether you want to delete the emails. To get new emails into your Gmail account, you should start with the Add a POP3 mail account you own from Accounts and Import. You’ll be asked to enter the email address for the other account.
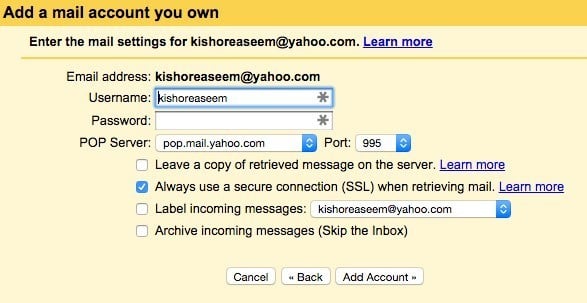
However, the next step is different than what we had did when importing emails. Here you will enter the password and usually Google can figure out the POP server settings automatically. You’ll also have several options like whether you want to leave a copy of the email on the server, whether you want to use SSL (recommended), whether to label the messages and whether you want to archive them.
If you leave the default setting as shown above, the emails will just show up in your Gmail inbox like normal email. When you are done, click the Add Account button. Also, it’s worth noting that any new unread emails in your Inbox will also be imported into Gmail. In my case, I had an unread email in my Yahoo account from one year back. In addition to new emails importing, it imported that email and I couldn’t even find it in Gmail unless I searched for it because it was way in the back on my inbox. So it’s worth labeling the incoming messages so you can easily find all the emails from the other email account in case a bunch of unread ones are also imported. The last thing you can do to get email into Gmail is to simply set forwarding on the other email account to your Gmail account. You could set it up that way, but I prefer to use the two methods included in Gmail for getting old and new emails. If you have any questions, post a comment. Enjoy!
