To actually install something that customizes your phone, you’re going to need something called a custom recovery. TWRP recovery is one of these custom recoveries for Android that lets you install a ton of custom developments on your Android based devices. You’ll see how to install and use it in the following guide.
What Is TWRP Recovery?
Custom recovery with TWRP was developed for Android devices. When you install it on your device, it replaces the stock recovery and gives you additional features that weren’t present in the stock one. It’s an open-source project and is available for a number of Android-based phones and tablets. You can grab yourself a copy of it for your specific phone model and flash it away to enjoy many of its features on your device.
How To Install a Custom Recovery With TWRP On Android?
To install a custom recovery with TWRP on your Android device, you have two ways to do it. What method you use to install it depends on your specific model’s root requirements. Certain phones first require you to install a custom recovery on them and then gain root whereas some other phones must first be rooted before you can install a recovery on them. The following sections should guide you what method you should be using to install TWRP on your phone.
Use TWRP App To Install The Recovery
In most cases where your phone is already rooted, you can use the TWRP app to install the custom recovery on your device. This is an easier and quicker way to get a custom recovery up and running on your phone as it does all the flashing procedures by itself.
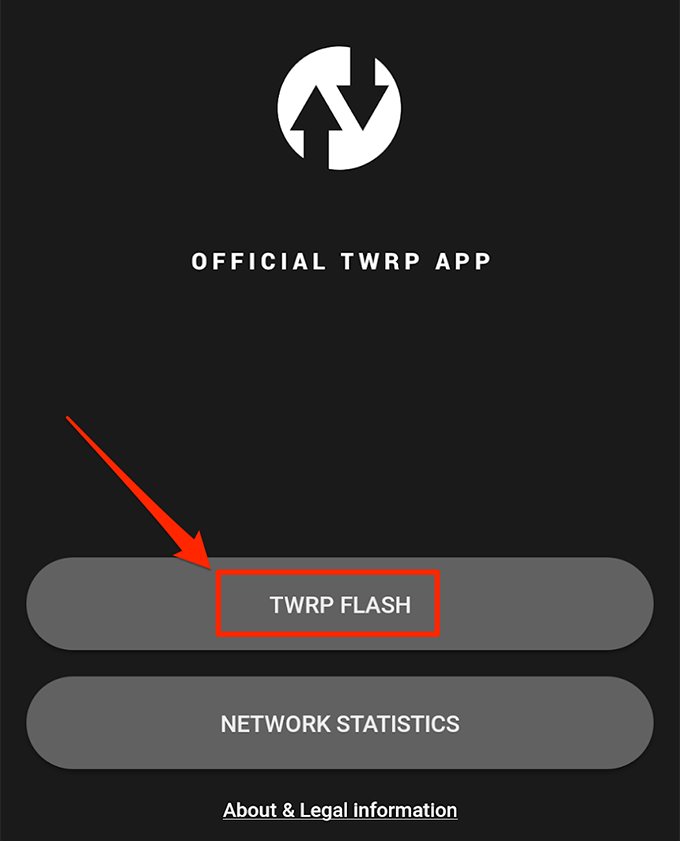
Launch the Google Play Store on your device, search for Official TWRP App, and install it on your device.Launch the app and tap on the option that says TWRP Flash.
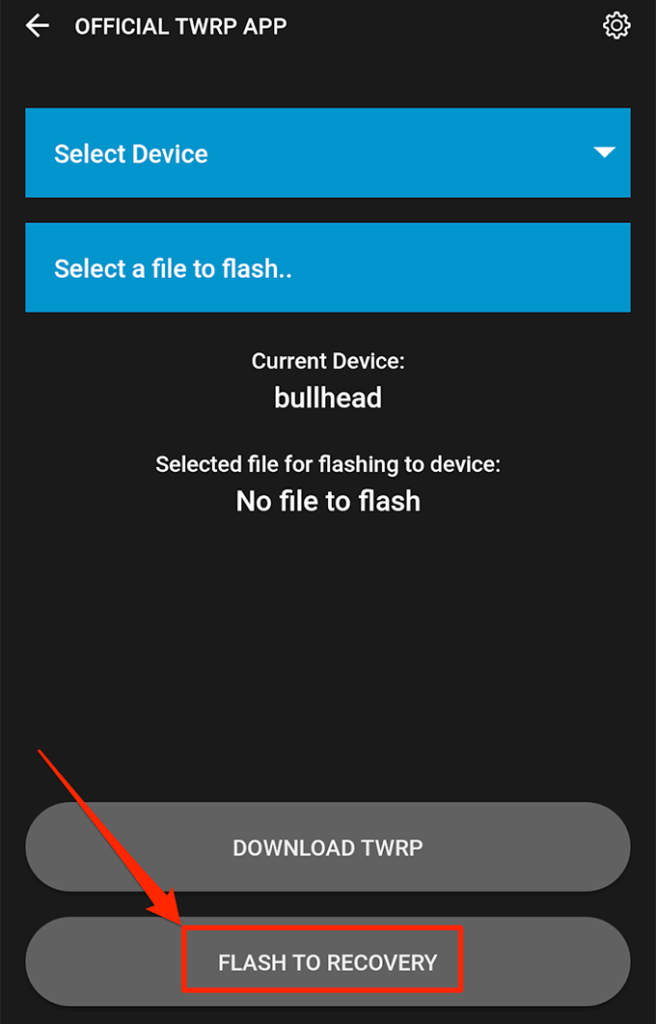
Choose your device model from the dropdown menu on the following screen and tap on Flash to Recovery.
It’ll download and flash the TWRP custom recovery image to your phone’s recovery slot.
Use Fastboot To Install TWRP Recovery
If your device first requires you to install a recovery and then you can root it or if the app method doesn’t work for you for some reason, you can manually flash the recovery image on your device using Fastboot. Fastboot helps you replace the stock recovery on your device with a custom one and you only need to run a command to do it.
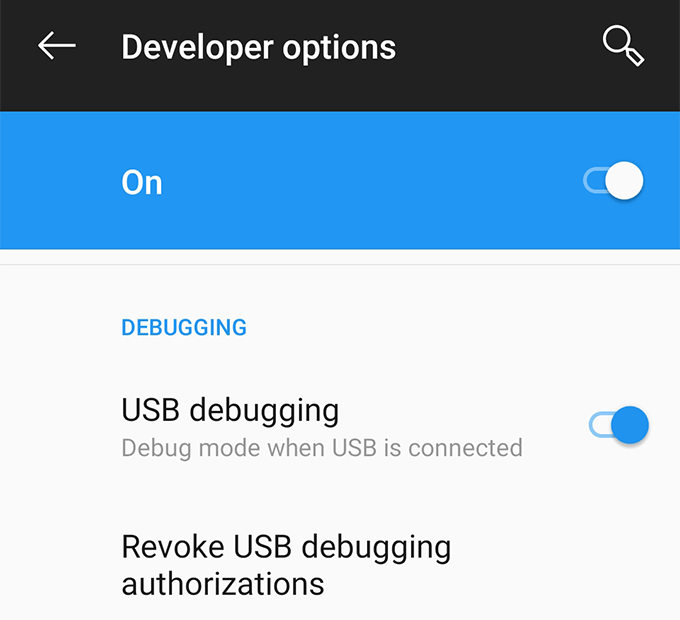
On your Android device, head to Settings > Developer options and enable the USB debugging option.
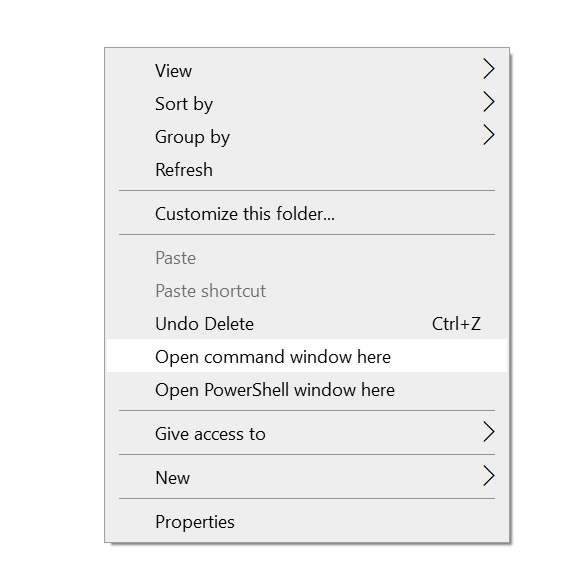
Connect your device to your computer using a USB cable.Download and extract the Fastboot package to your computer.Download the IMG version of TWRP recovery for your device and save it in the Fastboot folder.Open the Fastboot folder, hold down Shift on your keyboard, right-click anywhere blank, and select Open command window here.
Type in the following command and it’ll reboot your device into the bootloader mode.adb reboot bootloader
Enter the following command replacing twrp.img with the actual name of the recovery you’ve downloaded and hit Enter.fastboot flash recovery twrp.img
When the recovery is flashed, enter the following command to reboot your device.fastboot reboot
The TWRP recovery should be installed on your Android device.
How To Enter The TWRP Recovery Mode On Android?
Since a custom recovery isn’t a regular app, it won’t be available in your app drawer for you to launch it. You’ll need to either press a key combination to get into the TWRP recovery mode or run a command to reboot your device into the recovery. Both methods should do the same job and it depends on what you’re comfortable doing. You’ll probably not want to use the key combination when you’re running commands and similarly you won’t want to use a command when you aren’t using a command utility.
Using Key Combination To Enter The TWRP Recovery Mode
The key combination to enter the recovery mode varies by the device you have. Something that works for a Samsung device may not work for a Pixel phone, and so on. On most phones, though, you can press the Volume Down and Power buttons at the same time to reboot into the bootloader. Then you can select the Recovery option and enter the TWRP recovery mode on your device. On some other phones, you can immediately reboot into the recovery by pressing the Volume Up and Power buttons at the same time.
Using ADB To Reboot Into The TWRP Recovery Mode
This method should work for all the devices that support ADB and Fastboot. You basically need to run a command and it’ll reboot you into the recovery.
Run the following command from the Fastboot folder and your phone will reboot into the TWRP recovery mode.adb reboot recovery
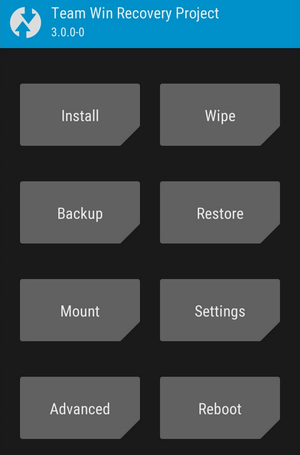
You’ll see various options when your phone reboots into the recovery.
How To Use The TWRP Custom Recovery On Android?
In most cases, you’ll only be using the following features of the TWRP custom recovery on your Android device.
Install
It’ll let you flash various custom files including custom recoveries, root files, custom kernels, custom ROMs, and so on. You’ll be using this option the most.
Wipe
This will let you wipe off the data on your device and factory reset it. You can use it in case the option in the default Settings app doesn’t work.
Backup
This lets you create a full backup of your Android device. It can include all the contents of your phone.
Restore
This allows you to restore the backups you’ve created before on your device. You need a single-tap and all of your data is restored on your phone.
