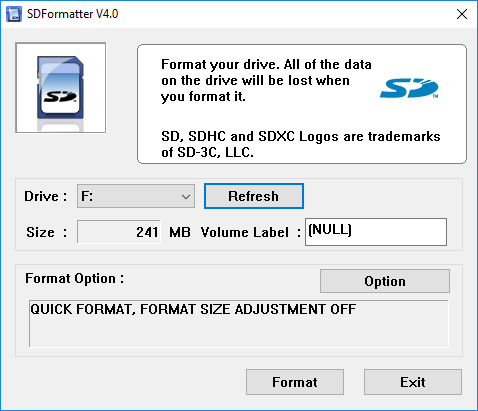
The SD Association provides an SD card formatter for this purpose. Yes, they recognize Windows has a built-in formatting feature, however, they warn that by using the generic operating system formatter, “optimum performance may not be experienced.” Translation: SD card death and less picture-saving space. The program can be downloaded on both Mac and Windows. All SD, SDHC and SDXC cards are supported and using a USB SD card reader is recommended for the formatting process. Once you install and run the program, it initializes with just one small screen.
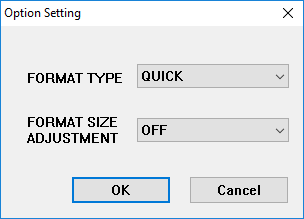
Make sure you insert your SD card into the reader before you start up the program. The program is smart enough to scan all the drives and find the drive for the SD card. If not, just click the Refresh button. If you’re having trouble getting the card to show up in the dropdown, you might have to install the SDXC driver for that particular type of card. Next, click Option to select how you want the SD card formatted. A dialogue box appears with a dropdown menu listing three “format type” options. The first, Quick, is simply a standard format that erases the Master Boot Record (MBR) on the SD card. Even though the data cannot be accessed using Explorer or Finder on Windows and Mac, it remains on the card itself.
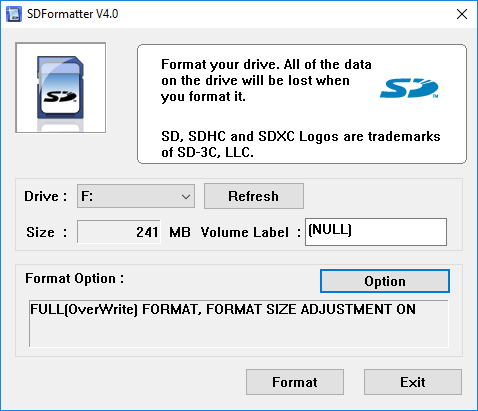
The Full (Overwrite) option will initialize the card and overwrite all the data with meaningless data. This method is more secure than simply erasing the data on the SD card because it is much harder to retrieve previously written data if you overwrite it. This option will take much longer than Full (Erase) or Quick. The Full (Erase) option deletes the data on the SD card. Using special software and tools, it is possible to retrieve data that was deleted using this method. If the card does not support this method, it will revert to the Quick format. Under the Format Type dropdown menu is a second menu called Format Size Adjustment that asks if you want to try to increase the amount of space on your SD card or not. Turning this option on will allow you to use the maximum space possible on your SD card. Once you have made your selection, click OK. My recommendations are to choose Full (Overwrite) and turn Format Size Adjustment to ON. Back on the main screen, it should show you the settings you have selected.
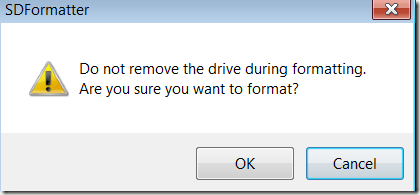
Finally, click Format. You will be asked one last time if you are sure you want to do this. If you are sure, click OK.
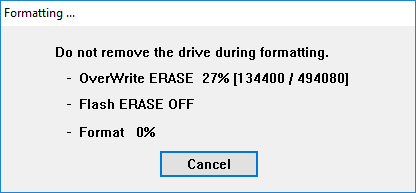
A new dialogue box then displays the status of the formatting process. For the options selected above, it will overwrite the entire card with random data and then format the card. If you are using a larger disk, the process could take a while. Do not turn off your computer or remove the disk until the entire process is complete.
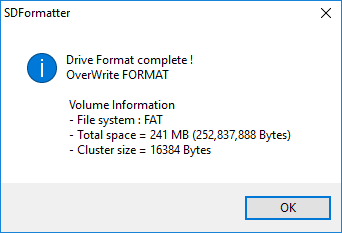
When complete, a dialogue box appears telling you the results of the formatting process.
Overall, the program works well and it will ensure that your card lasts longer and that your data is permanently removed, if you are planning on giving it to someone else. If you have any questions, feel free to leave a comment. Enjoy!
